
Tools
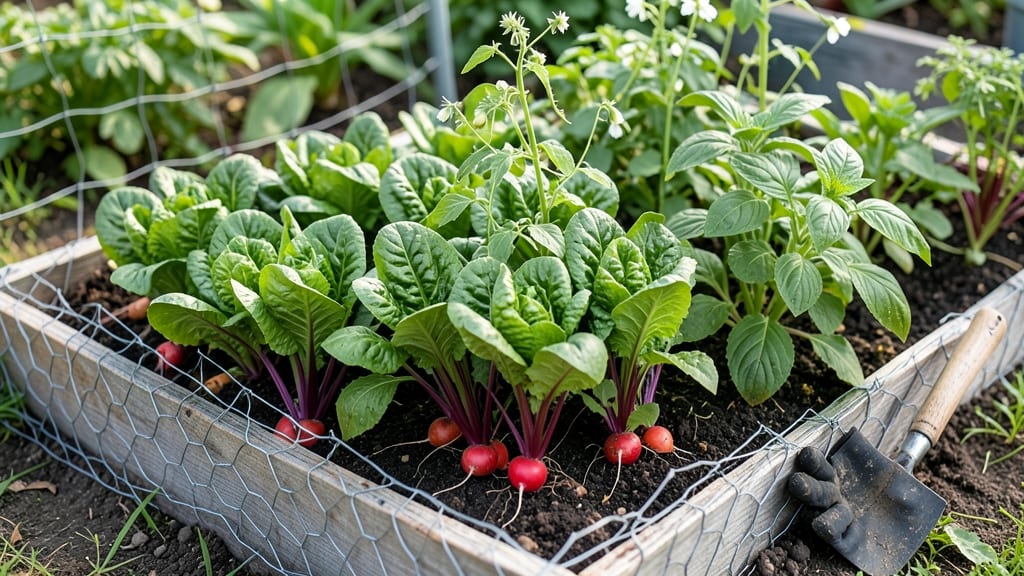
A vegetable garden protected by chicken wire can solve half the problems most gardeners face—pests, soil erosion, and even awkward plant spacing—without breaking the bank.
If you’ve ever struggled with pests nibbling your 🥕 or soil washing away after a rainstorm, chicken wire might already be the solution you’re overlooking. This humble material isn’t just for fencing; it’s a game-changer for organizing, supporting, and safeguarding your crops.
From raised bed reinforcement to DIY trellises for cucumbers and beans, chicken wire turns cluttered garden corners into structured, high-yield spaces. It’s lightweight, affordable, and reusable—perfect for Zone 6a gardeners who want to maximize their planting window from April to October.
Below, I’ll show you five clever ways to repurpose chicken wire in your garden, including how to build sturdy supports, deter critters, and even create vertical growing zones without the hassle of expensive materials.
5 Unexpected ways to use chicken wire in your vegetable garden
I’ll admit, I used to think chicken wire was just for keeping chickens in—or out. But after experimenting with it in my own vegetable garden, I’ve discovered it’s a game-changer for organization, protection, and even vertical growing.
This affordable, flexible material can solve common gardening headaches like soil erosion, pest invasions, and cluttered layouts without breaking the bank.
Beyond its traditional use, chicken wire transforms into trellises, raised bed frames, and even weed barriers. The best part? You likely already have it stashed in your shed or can grab a roll for under $10.
Let’s explore five creative ways to repurpose it in your garden today.
- 1 Climbing Plant Trellises – Bend wire into arches or teepees for cucumbers, squash, or pole beans. Secure stakes at 12-inch intervals for stability.
- 2 Raised Bed Reinforcement – Line the bottom of beds with wire to prevent soil compaction and root binding. Cut to fit and tuck edges into the frame.
- 3 Pest Barriers – Create a 3-foot tall wire fence around young seedlings to block rabbits and deer. Bury the bottom 6 inches for extra protection.
- 4 Weed Suppression Mats – Lay wire flat over garden paths or between rows to smother weeds while allowing water and air to reach plants. Cut holes for existing plants.
- 5 Vertical Garden Frames – Bend wire into cubes or spirals to grow herbs or strawberries on fences. Attach to walls or trellises for a space-saving solution.
For my cucumber trellis, I bent 18-gauge chicken wire into a 4-foot arch and secured it with wooden stakes. The vines now climb effortlessly, saving space and keeping fruits off the ground where pests can’t reach them.
I also lined my raised beds with wire to prevent soil from spilling out during heavy rains—a simple fix that’s made a huge difference.
If you’re worried about durability, don’t be. While chicken wire isn’t as rigid as wood or metal, it’s surprisingly strong when used creatively. For example, I’ve used it to create temporary supports for tomato plants during windy seasons.
Just avoid bending it too sharply, as it can lose its shape over time. For long-term projects, consider galvanized wire to resist rust.
One of my favorite hacks is using chicken wire as a seedling protector. I bend it into low cages (about 12 inches tall) and place them over newly transplanted seedlings.
This keeps curious pets and insects away while the plants establish roots. It’s a low-cost, reusable solution that works wonders for fragile young plants like basil or lettuce.
For weed control, I cut wire into 2-foot squares and lay them between rows of carrots and radishes. The wire blocks sunlight from reaching weeds while still allowing water to seep through.
It’s a game-changer for keeping my garden neat without resorting to chemical herbicides. Plus, I can reuse the wire in other areas next season.
Pro tip: If you’re using chicken wire for vertical gardening, attach it to a sturdy frame or fence post. For example, I created a herb spiral by wrapping wire around a wooden post and weaving it into a spiral shape.
Now, I can grow mint, parsley, and chives in a compact, eye-catching display that maximizes my small balcony space.
Remember, chicken wire is versatile but not indestructible. While it’s perfect for temporary or semi-permanent solutions, it won’t last forever in harsh conditions. However, with a little creativity, it can solve problems you didn’t even know you had.
Start small—try one of these ideas this season and see how it transforms your garden!
🌱
Chicken wire trellises: how to support heavy vegetables like cucumbers and squash
When cucumbers and squash take over your garden, their sprawling vines can quickly turn into a tangled mess. A chicken wire trellis solves this problem while boosting yields by keeping fruits off the ground and improving air circulation.
The key is using the right wire gauge—19-gauge for lightweight cucumbers and 16-gauge for heavier butternut squash or zucchini. This balance ensures durability without breaking the bank.
Start by measuring your garden space. For cucumbers, aim for a 4-foot-tall trellis with 12-inch spacing between vertical wires. Squash, which produces heavier fruits, needs a 5-foot-tall structure with 18-inch spacing to prevent sagging.
Bend the wire into a pyramid or A-frame shape for stability—this design distributes weight evenly and resists toppling in wind or rain.
- Step 1 Cut chicken wire to your desired height (4–5 feet) and width (3–4 feet). Use heavy-duty wire cutters to avoid jagged edges.
- Step 2 Bend the wire into a pyramid shape by folding the top third inward at a 45-degree angle. Secure with garden staples or zip ties for extra strength.
- Step 3 Drive T-posts into the ground at each corner of your trellis. Space them 2–3 feet apart for stability, especially in windy areas.
- Step 4 Attach the trellis to the posts using galvanized wire or plastic ties. Leave 6–12 inches of slack at the top to accommodate plant growth.
- Step 5 Weave horizontal wires every 12–18 inches for vines to climb. Use 14-gauge wire for extra support if growing heirloom squash or long cucumbers like 'Straight Eight'.
- Step 6 Plant cucumbers or squash at the base of the trellis, 3–4 inches from the wire. Train vines upward as they grow, tying them gently with soft plant ties to prevent damage.
Pruning is just as important as building the trellis. For cucumbers, remove side shoots (those growing off the main vine) to direct energy upward.
Leave 2–3 main vines per plant to maximize fruit production. Squash, however, benefits from limited pruning—focus on removing yellowed leaves and overcrowded vines to improve airflow and reduce disease risk like powdery mildew.
One common mistake is overloading the trellis. Cucumbers can produce 5–10 pounds of fruit per plant, while squash might yield 20+ pounds. To avoid collapse, harvest fruits regularly—every 3–5 days for cucumbers and weekly for squash.
This not only prevents structural stress but also encourages continuous production. If you notice vines slipping, add extra horizontal wires or reinforce weak spots with bamboo stakes tied to the trellis.
Extend your trellis’s lifespan by coating it with waterproof spray or wrapping it in landscape fabric before the first frost. This protects against rust and extends its use for 3–5 years.
For next season, consider adding drip irrigation along the base of the trellis—this delivers water directly to roots while keeping foliage dry, reducing fungal diseases like downy mildew.
With a sturdy chicken wire trellis, you’ll reclaim garden space, reduce pests (like squash bugs hiding in foliage), and enjoy cleaner, higher-quality produce. Plus, the vertical growth frees up ground space for other crops like radishes or lettuce.
Start small with a 4-foot trellis for cucumbers, then expand to support winter squash or melons as your confidence grows.