
Picking
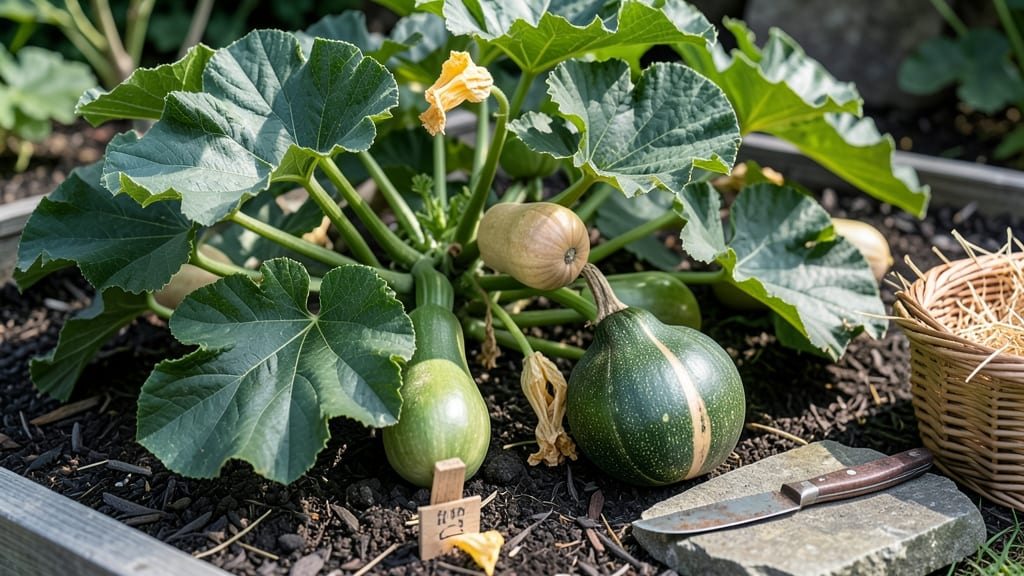
To pick butternut squash from your garden at the perfect time 🎃, look for a hard, tan rind and a dry stem—these are the clearest signs of peak ripeness.
Butternut squash is a gardener’s dream—sweet, nutty, and packed with nutrients—but picking it too early or too late can ruin its flavor and texture. Timing your harvest perfectly ensures a delicious, long-lasting crop that’ll impress at your dinner table.
Most varieties take 80 to 120 days to mature, but seasonal factors like frost risk and soil temperature can shift that window. In USDA Zone 6a, where spring planting runs from mid-April to mid-May, harvests typically start in October and wrap up by November.
Below, I’ll break down the three key tests for ripeness—color, texture, and stem condition—plus how to adjust for early or late plantings. You’ll leave here knowing exactly when to pull that squash for the perfect harvest.
3 Key color and texture tests to determine perfect butternut squash ripeness
Harvesting butternut squash at the right moment transforms your garden labor into a sweet, nutty reward. But how do you know when it's truly ready?
Unlike some vegetables, butternut squash doesn't ripen further after picking, so timing is everything. Miss the window, and you'll end up with bland, watery flesh or tough, overripe skins. Let me walk you through the three foolproof tests I use every fall to guarantee perfect squash.
The first clue lies in the rind color. When ripe, butternut squash develops a dull tan or beige hue, losing its initial greenish cast.
This color shift signals the squash has stopped growing and is ready for harvest. Immature squash will still show green streaks, while overripe ones may develop brown patches or soft spots. Pay attention to this subtle change—it's your first green light to check further.
Here's where things get interesting: the stem condition reveals the squash's true maturity. A ripe butternut squash will have a dry, papery stem that easily snaps off at the base. If the stem is still green and flexible, your squash needs more time on the vine.
This test is crucial because even if the rind looks right, a green stem means the fruit isn't fully developed inside. I've learned this lesson the hard way—always check both color and stem!
-
1.Rind Color: Look for dull tan/beige (not green or brown). Press test: Hard rind that's difficult to pierce with a fingernail.
-
2.Stem Condition: Stem should be dry and brittle. Gently tug—it should snap cleanly at the base. Green stems = not ready!
-
3.Seed Cavity: Check the blossom end (where stem attaches). Seeds should be fully formed and brown. Hollow cavity = underripe.
The third test often gets overlooked but is equally important: examining the seed cavity. At the blossom end (where the stem attaches), you'll find a small cavity. In a ripe butternut squash, this cavity should contain fully developed, brown seeds.
If you see mostly white or hollow cavities, your squash needs more time. This test helps distinguish between varieties—some butternut types mature faster than others, and this internal check prevents guesswork.
Let me share a personal tip from my garden: weight matters. A ripe butternut squash feels surprisingly heavy for its size. Lift a candidate squash—if it feels light, it's not ready. This tactile test works best when comparing two squash of similar size.
I've used this trick for years to spot the ripest specimens in my patch, especially when dealing with a bumper crop where not all squash mature at once.
Timing your harvest correctly also means understanding your climate zone. In cooler regions (USDA zones 3-5), aim to harvest before the first frost hits—typically late September to early October. Warmer zones (6-8) can wait until October or November.
I once left my squash too long in zone 6a, and a light frost damaged several before I could harvest them. Always check your local frost dates and plan accordingly.
One common mistake I see gardeners make is relying solely on days to maturity from seed packets. While these provide a general guideline (typically 80-120 days for butternut squash), they don't account for your specific growing conditions.
Instead of counting days, use the color and texture tests I've described—they're more reliable indicators of true ripeness. Your local microclimate plays a huge role in how quickly squash matures.
For the home gardener, the best time to harvest is on a dry, sunny morning. This gives the squash time to dry slightly before storage, reducing the risk of rot.
After harvesting, let your squash cure in the sun for 10-15 days—this hardens the skin and concentrates the sugars. I cure mine on a wooden pallet in my garage, turning them occasionally. This simple step makes a noticeable difference in flavor and storage life.
Remember, butternut squash won't ripen further after picking, so don't wait too long once you see these signs. Overripe squash develops soft spots and loses its sweetness. When in doubt, harvest a few days early—you can always store them properly to let them finish ripening indoors.
With these three tests in your gardening toolkit, you'll consistently harvest butternut squash at peak perfection, ready to impress at your dinner table.
Butternut squash harvest timing: days to maturity vs. seasonal adjustments
Understanding your butternut squash's days to maturity is the first step to planning a perfect harvest. Most seed packets list a range like 80-120 days, but this is just a starting point. Your local climate zone and planting timing can shift that window by weeks—or even months.
For example, in USDA Zone 5, you might need to adjust for an earlier frost, while Zone 9 gardeners can extend the season with late plantings.
I always start by checking my seed packet’s days-to-maturity estimate and then cross-referencing it with my last frost date. For butternut squash, which thrives in warm weather, I count backward from the first frost in my area.
If my frost date is October 15, I’ll aim to harvest by mid-October, leaving room for a 2-3 week buffer before cold weather sets in.
| Factor | Zone 5 (Cold) | Zone 7 (Moderate) | Zone 9 (Warm) |
|---|---|---|---|
| Days to Maturity (Seed Packet) | 80-100 days | 80-100 days | 80-100 days |
| Last Frost Date | May 15 | March 15 | January 15 |
| Ideal Planting Window | May 1-15 | March 1-31 | January 15-April 15 |
| Estimated Harvest Window | August 15-September 15 | June 15-July 15 | April 15-May 15 |
| First Frost Risk | High (October 15) | Moderate (November 15) | Low (December 15) |
| Seasonal Adjustment | Plant early varieties or use row covers | Standard timing works well | Extend season with late plantings |
Seasonal adjustments are where most gardeners trip up. For example, if you’re in Zone 5 and plant butternut squash in early May, you’ll need to choose faster-maturing varieties (like 'Waltham Butternut', which matures in 80 days) to avoid frost.
Meanwhile, in Zone 9, you can push your harvest window by planting in late spring or early summer for a fall crop. Just remember: butternut squash needs warm soil and air to thrive, so never plant before your soil reaches 60°F.
Another trick I use is succession planting for a staggered harvest. Plant a second batch 4-6 weeks after the first to spread out your harvest and reduce waste. This works especially well in longer growing seasons (like Zones 8-10).
Just be sure to leave enough space—butternut squash vines spread 2-3 feet wide—so your plants don’t compete for nutrients.
Don’t forget to account for unpredictable weather. A late spring frost or early heatwave can throw off your timeline. I always keep an eye on 7-day forecasts and adjust my harvest plans if a cold snap is coming.
If frost is forecasted before your squash is ready, you can try extending the season with row covers or harvesting slightly underripe squash (though flavor may suffer). The key is balancing patience with pragmatism—waiting too long risks rot, while picking too early means bland, watery flesh.
Finally, mark your calendar with 3 key dates: your planting date, the estimated harvest window (based on days to maturity), and your local frost date. Use these to calculate a harvest window of 2-3 weeks—this gives you flexibility to adjust for weather or maturity delays.
With this system, I’ve never missed a harvest, and my butternut squash always comes out sweet, firm, and ready for storage.