
Landscaping
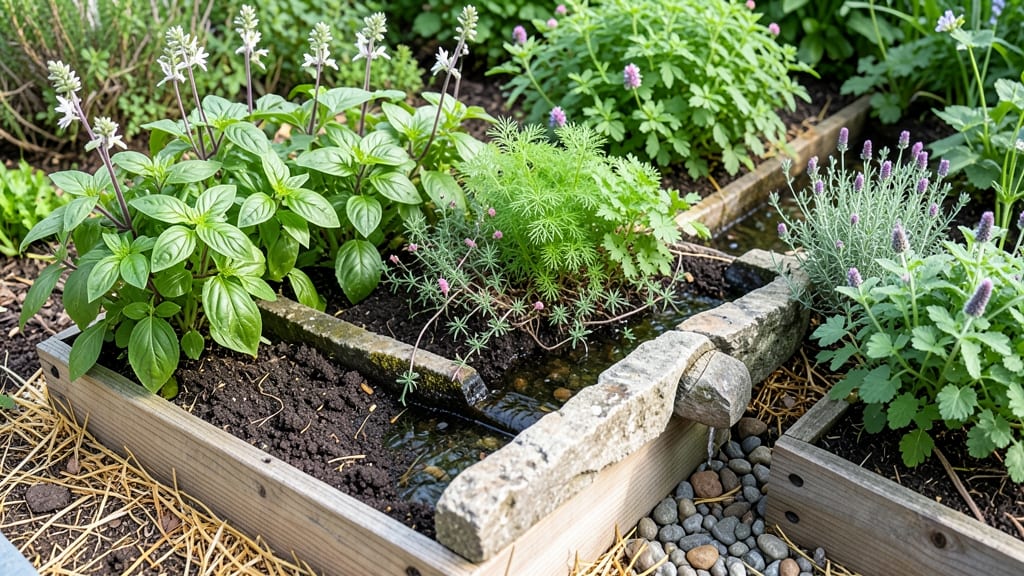
Repurposing water troughs into raised garden beds 🌱 is a game-changer for urban gardeners who need to stretch every inch of space while keeping plants happy and hydrated.
Picture this: a balcony that used to hold a single potted basil now grows a thriving bed of lettuce, herbs, and cherry tomatoes—all in a container that’s half the cost of store-bought raised beds.
The best part? These troughs double as self-watering systems, cutting down on your chores while maximizing growth.
Whether you’re working with a tiny patio or a cramped backyard, water troughs offer endless design flexibility. You can stack them vertically, nest them under benches, or even turn them into window-box gardens.
The key is choosing the right materials, ensuring proper drainage, and picking plants that thrive in their unique shape.
In this guide, I’ll walk you through 5 space-saving designs, common mistakes to avoid, and step-by-step instructions to turn your old trough into a lush, low-maintenance garden. Let’s get growing!


How to convert water troughs into functional raised garden beds
Water troughs offer the perfect foundation for space-saving raised garden beds—their durable construction and built-in water retention make them ideal for urban gardeners. With a few modifications, you can transform these sturdy containers into self-watering planters that maximize growing space while minimizing maintenance.
The key lies in proper drainage solutions, soil preparation, and structural reinforcement to ensure longevity and plant health.
Before diving into your project, gather essential supplies like drill bits, landscape fabric, compost, and potting mix. Start by cleaning your trough thoroughly to remove any residue or debris that could harm your plants.
Measure the dimensions to determine how much soil mix and mulch you’ll need—most troughs hold 10-20 gallons, perfect for herbs, leafy greens, or small vegetables.
One of the biggest advantages of using water troughs is their self-watering capability. The trough’s shape naturally retains moisture, reducing the frequency of watering. However, proper drainage holes are critical to prevent root rot.
If your trough lacks them, drill ¼-inch holes along the bottom and sides, spacing them 6-8 inches apart. This ensures excess water escapes while keeping the soil moist.
To enhance water retention further, line the bottom of the trough with landscape fabric before adding soil. This prevents clogging while allowing water to drain freely. Next, fill the trough ⅓ full with a mix of compost and perlite—this improves aeration and drainage.
Top it off with high-quality potting soil, leaving 1-2 inches of space at the top for mulch and easy watering.
Now, let’s reinforce the structure for durability. If your trough is plastic, ensure it’s UV-stabilized to prevent cracking. For metal troughs, apply a weatherproof sealant to protect against rust. Place the trough on level ground or a raised platform to improve stability, especially in windy areas.
Adding feet or cinder blocks underneath can also help with airflow and drainage.
Step-by-Step Guide to Repurposing Water Troughs
-
Step 1: Clean and Inspect
Scrub the trough with soapy water and a stiff brush to remove dirt or chemical residues. Check for cracks or weak spots—repair with epoxy or silicone sealant if needed. -
Step 2: Drill Drainage Holes
Use a ¼-inch drill bit to create holes along the bottom and sides. Space them 6-8 inches apart for optimal drainage. Cover holes with landscape fabric to prevent soil loss. -
Step 3: Layer for Drainage
Add a 2-inch layer of gravel or broken pottery at the bottom, followed by landscape fabric. This prevents clogging and improves water flow. -
Step 4: Mix Soil Components
Combine ⅓ compost, ⅓ perlite, and ⅓ potting soil for a lightweight, nutrient-rich mix. Avoid garden soil—it compacts easily and drains poorly. -
Step 5: Reinforce Structure
For plastic troughs, add support brackets if needed. For metal troughs, apply a weatherproof coating to extend lifespan. Place on a stable surface or elevate with blocks. -
Step 6: Plant and Mulch
Choose compact varieties like basil, lettuce, or strawberries. Space plants according to their mature size, then top with 1-2 inches of mulch to retain moisture. -
Step 7: Water and Monitor
Water deeply until it drains from the bottom. Check soil moisture weekly—water troughs retain moisture well but may need top-ups during heatwaves.
When selecting plants for your water trough garden bed, prioritize compact varieties that thrive in containers. Herbs like basil, thyme, and parsley flourish in these spaces, as do leafy greens such as spinach and kale.
For flowers, marigolds, nasturtiums, and petunias add color while deterring pests. Avoid heavy feeders like corn or pumpkins—they’ll outgrow the space quickly and deplete nutrients faster.
Maintenance is minimal but crucial for long-term success. Water in the morning to reduce evaporation and fungal risks, and fertilize every 4-6 weeks with a balanced organic fertilizer. Monitor for pests like aphids or slugs—handpick or use neem oil as needed.
In winter, empty the trough or move it to a sheltered location to protect it from freezing temperatures.
One creative way to maximize space is to stack troughs vertically or arrange them in tiered systems. This works beautifully for herbs and shallow-rooted plants, doubling your growing area without taking up extra floor space.
Pair your trough garden with climbing plants like cucumbers or beans trained along a trellis—this adds vertical interest while utilizing every inch of your garden.
With a little creativity, your water trough raised garden bed can become a focal point in your outdoor space. Paint the trough in a vibrant color or line it with decorative stones for a polished look.
Add solar-powered lights or whimsical plant markers to personalize your setup. The best part? You’re not just growing plants—you’re reviving an old container and giving it a second life as a productive garden feature.
5 Best water trough raised garden bed designs for small spaces
Transforming water troughs into raised garden beds is a game-changer for urban gardeners with limited space. These space-saving designs maximize vertical growth while keeping maintenance simple. Whether you're growing herbs on a balcony or veggies in a courtyard, these layouts prove that small spaces can yield big harvests.
Water troughs naturally retain moisture, reducing your watering frequency by up to 50%. Their sturdy construction also makes them ideal for high-density planting—perfect for container gardening in apartments or rooftops. Plus, their rustic charm adds a garden aesthetic that blends seamlessly with modern or cottage-style decor.
For vertical stacking, place 3-4 troughs atop one another using galvanized brackets to create a self-watering cascade. This design is ideal for herbs like basil and parsley, which thrive in shallow roots but need consistent moisture.
Add drainage holes between layers to prevent root rot while maintaining humidity for leafy greens.
Tiered systems are perfect for sun-loving vegetables like tomatoes and peppers. Position the lowest tier in full sun and stagger heights to avoid shading. Use coconut coir as a moisture barrier between layers to prevent nutrient leaching. This setup also makes harvesting easier—no more bending!
If you're working with ultra-limited space, consider under-bench designs. Cut troughs to fit snugly beneath outdoor furniture or deck railings. These hidden gardens are perfect for fast-growing microgreens or salad mixes, which mature in 30-45 days.
Just ensure the area gets at least 4 hours of sunlight daily.
For window-box adaptations, mount troughs horizontally along south-facing walls or balcony railings. This creates a living curtain of flowers and herbs while keeping pests at bay. Use lightweight potting mix to reduce strain on mounts, and add succulents like sedum for drought-resistant variety.
Finally, modular setups let you expand or shrink your garden as needed. Connect 2-4 troughs side-by-side using L-shaped brackets and a shared water reservoir at the base. This works beautifully for root vegetables like carrots and radishes, which need deeper soil but benefit from shallow watering.
Just remember to rotate crops yearly to prevent soil depletion.
Each of these designs turns wasted space into a productive garden—proving that even the smallest yard can grow a bountiful harvest. Start small, experiment with layouts, and watch your urban oasis flourish! 🌱