
Picking
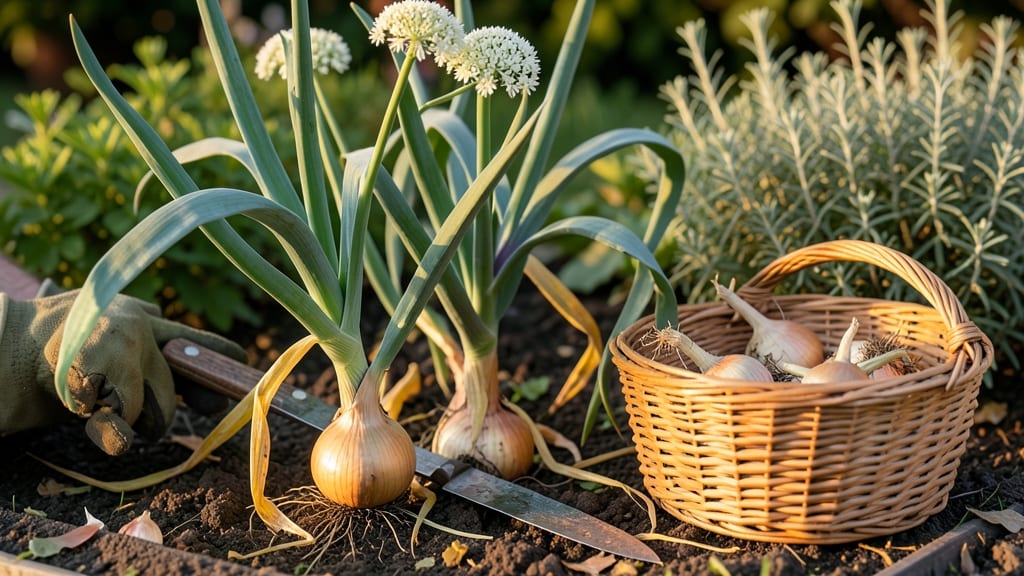
Harvesting onions from the garden at the right time ensures sweet, tender bulbs instead of tough, pungent ones—so timing is everything.
Picture this: you’ve nurtured your 🧅 plants all season, and now the tops are yellowing and flopping over. That’s your cue—but wait too long, and the flavor fades.
Too soon, and you’re left with small, underdeveloped bulbs. The difference between perfect harvests and wasted effort often comes down to knowing these three key visual cues.
Climate plays a role too. In warmer regions, onions may mature faster, while cooler zones need extra patience. The good news? Whether you’re growing storage onions or snipping green tops, the same principles apply—just with slight timing tweaks.
Below, I’ll break down exactly when to pull them for the best flavor and how to tell if they’re ready.
You’ll also discover how to salvage onions harvested too early or late, plus the best post-harvest care to keep them fresh longer. No more guessing—just perfectly timed onions every time.
3 Clear visual signs your onions are ready for harvesting
Harvesting onions at the right time transforms your garden into a flavor powerhouse. Miss the window, though, and you’ll end up with tough, pungent bulbs that lack sweetness. The key? Watching for these three foolproof visual cues that signal peak harvest readiness.
Whether you’re growing green onions for quick snipping or storage onions for long-term keeping, these signs apply to both—just with slight timing variations.
First, let’s address the most common mistake: assuming all onions mature at once. In reality, onions in the same patch can be ready weeks apart. That’s why relying on visual cues over calendar dates is your best strategy.
These signs work for yellow, red, and white onion varieties, as well as shallots, giving you confidence no matter what you’re growing.
- 1 Yellowing and Flopping Tops: When 50-70% of tops turn yellow and flop over, your onions are ready. This signals the bulb has stopped growing upward and is maturing underground.
- 2 Bulb Diameter of 1-2 Inches: Dig up a test onion—if the bulb measures 1-2 inches wide and feels firm (not soft or spongy), it’s prime for harvesting. Smaller bulbs won’t store well.
- 3 Thickened Neck (Stem): The stem between bulb and leaves should be about ½-inch thick. A thin neck means the bulb isn’t fully matured; a thick neck indicates it’s ready for harvest.
Let’s break down why these signs matter. The yellowing tops are your first warning that photosynthesis is shifting from leaf growth to bulb maturation. This change happens when the bulb reaches its ideal size, typically 90-120 days after planting.
If you wait too long, the tops will dry out completely, and the bulbs may split or develop a tough skin—ruining their storage potential.
For green onions (scallions), the rules are slightly different. You’ll harvest them when the bulb swells to ½-inch wide and the leaves reach 6-12 inches tall. Unlike storage onions, green onions don’t need to develop a thick neck—their flavor peaks when they’re still tender.
Simply snip them 1-2 inches above the bulb, and they’ll regrow for multiple harvests!
One visual cue often overlooked is the skin texture. Ready-to-harvest onions develop a dry, papery outer layer. Run your fingers over the bulb—if it feels rough and slightly crisp, it’s time to dig.
Moist, thin skin means the bulb isn’t mature enough. This texture change is especially critical for storage onions, as it indicates the bulb has built up enough sugars for long-term keeping.
Regional climate plays a role, too. In hot, dry climates, onions may mature faster and show these signs earlier (as early as June or July). In cooler, northern regions, you might not see these cues until late summer or early fall.
Pro tip: If your area has high humidity, harvest slightly earlier to prevent rot. The visual cues remain the same—just adjust your timing based on your local growing season.
Now, what if you’re unsure whether to harvest? Here’s a quick test: Gently pull up one onion and check its size and skin. If it meets the criteria in our numbered highlights, go ahead and harvest a few more.
If not, wait another 3-5 days and check again. This hands-on approach beats guessing, ensuring you get the best flavor and storage life from your onions.
Remember, harvesting onions is a skill that improves with practice. The more you pay attention to these visual cues, the more confident you’ll become. Soon, you’ll be harvesting onions at their peak—sweet, flavorful, and ready for your kitchen or storage.
And trust me, there’s nothing like the satisfaction of pulling up a perfectly mature onion from your own garden!
Harvesting green onions vs. storage onions: key differences
Not all onions are created equal when it comes to harvest timing. Green onions (also called scallions) and storage onions (like yellow or red varieties) have completely different harvest cues.
I’ve learned the hard way that cutting green onions too late turns them woody, while pulling storage onions too soon means small, pungent bulbs. Let’s break down when to harvest each type for maximum flavor and yield.
Your climate plays a huge role in harvest timing. Short-day onions (like Texas Early White) thrive in warmer regions and mature faster, while long-day onions (such as Yellow Sweet Spanish) need cooler temperatures to bulb properly.
Even in the same garden, these varieties will signal readiness at different times. Pay attention to both the plant’s visual cues and your local weather patterns.
| Factor | Green Onions | Storage Onions |
|---|---|---|
| Harvest Time | Whole plant at 6-8 inches tall, before bulbs form | When 50-60% of tops yellow and fall over |
| Bulb Size | Small, pencil-thin bulbs (½ inch diameter) | 1-2 inches diameter, firm to touch |
| Leaf Color | Bright green, no yellowing | 50-70% yellow, tops flop over |
| Neck Thickness | Thin, no bulb swelling | ½ inch thick at base |
| Weather Impact | Harvest before heat stress (75°F+) | Need cool nights (50-60°F) to bulb |
| Post-Harvest Use | Fresh use or quick freezing | Storage (cured, braided) or cooking |
For green onions, I always harvest the whole plant when it reaches about 6-8 inches tall—this is before the bulb starts to swell. If you wait too long, the bulbs become tough and bitter.
The key is to cut them just above the soil line with clean shears, leaving the roots intact if you want regrowth. I’ve found that harvesting green onions every 2-3 weeks encourages continuous production.
Storage onions, on the other hand, need patience. They’re ready when about 50-60% of the tops turn yellow and flop over. This usually happens 100-120 days after planting, depending on your variety. If you harvest too early, you’ll end up with small, pungent bulbs that won’t store well.
But if you wait too long, the skins toughen, and the flavor becomes sharp. Pro tip: Pull them on a dry day to help with curing.
One mistake I made early in my gardening days was treating all onions the same. I once harvested a batch of storage onions too early because the tops were yellowing, only to find they were tiny and wouldn’t keep.
Now, I double-check the bulb size and neck thickness before pulling. For short-day onions, I harvest in late spring, while long-day onions wait until summer or early fall when nights cool down.
Remember, the goal is flavor and storage potential. Green onions should taste mild and crisp, while storage onions need that sweet, oniony punch. Pay attention to your plants, and don’t be afraid to taste-test a few bulbs to check for doneness. Happy harvesting!