
Tools
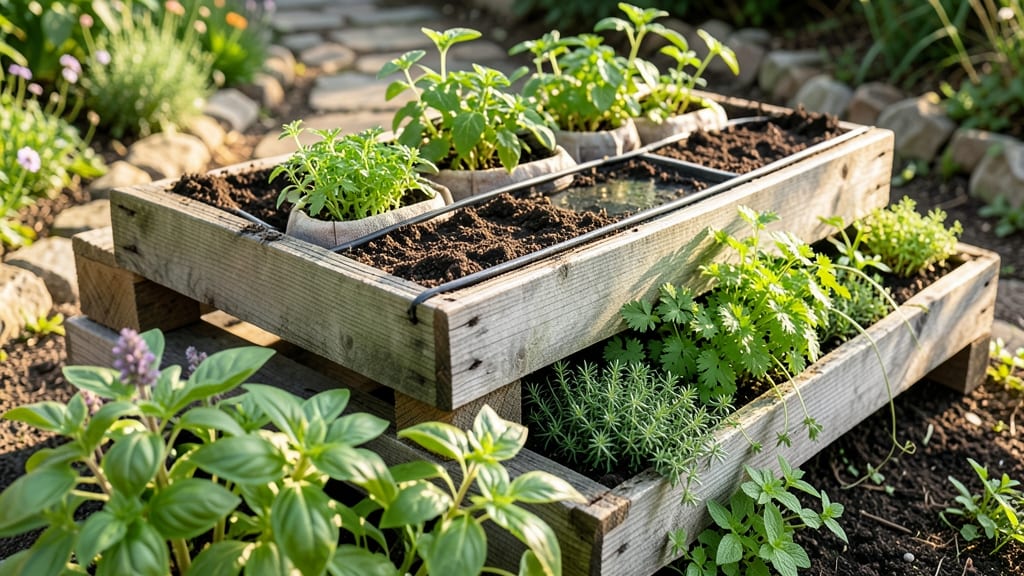
A pallet gardening table turns even the smallest balcony or patio into a thriving garden—no sprawling yard required.
Picture this: your morning coffee beside a table overflowing with fresh herbs and ripe tomatoes, all grown in a sturdy, upcycled pallet that fits snugly in tight spaces. This isn’t just gardening; it’s reclaiming every inch of your urban oasis with minimal effort and maximum reward.
Whether you’re crammed between neighbors or dreaming of a vertical veggie patch, a pallet gardening table gives you flexibility and style. No heavy lifting, no permanent installations—just a quick assembly and instant growing space.
Plus, the customization options are endless: paint it, stack it, or turn it into a multi-level wonderland for your 🌱 General Pallet Garden Plants.
Below, I’ll walk you through the easiest designs, the best plants for small spaces, and how to keep your table looking as good as it performs—so you can enjoy the harvest without the hassle.
How to build a sturdy pallet gardening table for urban spaces
Urban gardening thrives on creativity, and a pallet gardening table is one of the most versatile solutions for small spaces. These tables transform discarded materials into functional, space-saving planters that fit balconies, patios, and even windowsills.
The key to success lies in selecting the right materials and designing for durability and drainage—two critical factors for long-term plant health.
Before you start, decide whether you’ll use wooden pallets or HDPE plastic pallets. Wooden pallets are classic, budget-friendly, and biodegradable, but they require sealing to prevent rot.
HDPE pallets are lightweight, weather-resistant, and easier to clean, making them ideal for high-moisture environments. Both options offer endless design possibilities, from single-tier tables to multi-level vertical gardens.
Step-by-Step Guide to Building Your Pallet Gardening Table
- 1 Gather Materials: You’ll need 2-4 pallet halves, sandpaper, wood sealant (if using untreated wood), landscape fabric, potting soil, and drainage holes (if modifying pallets). For extra stability, add legs or brackets made from 2x4s or metal pipes.
- 2 Prep the Pallets: Sand rough edges and remove any nails or staples. If using wooden pallets, apply a weather-resistant sealant to prevent rot. For HDPE pallets, wipe down with a mild soap solution to remove debris. Let dry completely before proceeding.
- 3 Create Drainage Holes: Use a power drill to add drainage holes at the bottom of each pallet slat. Space them 2-3 inches apart to ensure excess water escapes. Cover the holes with landscape fabric to keep soil in place while allowing water to drain.
- 4 Assemble the Table: Stack pallets horizontally to create tiers or place them side by side for a single-level table. Secure the structure with metal brackets or wooden screws. For height adjustment, attach adjustable legs or use cinder blocks for elevation.
- 5 Line with Landscape Fabric: Place a layer of landscape fabric inside each pallet to prevent soil from falling through the slats. This also helps retain moisture and reduces weed growth. Cut fabric to fit snugly but not too tightly.
- 6 Fill with Soil: Add a high-quality potting mix blended with compost for nutrients. Leave 1-2 inches of space at the top to accommodate plant growth. For heavy plants like tomatoes, use a soil mix with perlite to improve drainage.
- 7 Plant and Water: Choose compact varieties of herbs, veggies, or flowers suited for container gardening. Water thoroughly after planting to settle the soil. Place your table in a location with 6+ hours of sunlight daily for optimal growth.
One of the biggest advantages of a pallet gardening table is its customizability. You can paint or stain the pallets to match your decor, add wheels for mobility, or even stack them vertically to maximize space.
For urban dwellers, consider adding a foldable design so you can store it when not in use or move it to follow the sun throughout the day.
To extend the lifespan of your table, seasonal maintenance is key. At the end of each growing season, remove old soil, clean the pallets with a vinegar solution, and store them in a dry place.
If using wooden pallets, reapply sealant annually. HDPE pallets require less upkeep but should still be checked for cracks or wear after heavy use.
For urban spaces, height is everything. A pallet gardening table should sit at a comfortable height—typically 30-36 inches—to avoid straining your back while tending to plants. Use adjustable legs or stack pallets to achieve the perfect height.
If space is extremely limited, opt for a single-tier design with built-in shelves for tools or small pots.
Don’t overlook the aesthetic appeal of your pallet table. Add decorative elements like fairy lights, painted accents, or climbing plants to create a cozy, inviting garden nook. Even in a tiny urban space, a well-designed pallet gardening table can become the centerpiece of your outdoor oasis.
With the right materials and a little creativity, your pallet gardening table will become a productive and stylish addition to your urban garden.
Whether you’re growing herbs for cooking, flowers for beauty, or veggies for fresh meals, this project proves that gardening in small spaces is not only possible but also
Best pallet gardening table designs for small balconies and patios
When space is at a premium, a pallet gardening table becomes your best ally for growing fresh produce. These designs maximize vertical space while keeping everything accessible. For small balconies, I recommend vertical pallet planters that hang on walls or railings, freeing up floor space.
On patios, tiered structures or foldable tables offer flexibility and easy storage when not in use.
Each design balances yield potential with space efficiency. For example, a single-tier table (30"x24") fits neatly on a balcony while supporting 12-16 plants. Meanwhile, tiered designs can double or triple that capacity without expanding your footprint.
The key is choosing a layout that matches your sunlight exposure and plant types—herbs thrive in shallow planters, while tomatoes need deeper pockets.
| Design Type | Space Savings | Best For | Plant Capacity |
|---|---|---|---|
| Vertical Pallet Planter | Hangs on walls/railings | Herbs, leafy greens | 8-12 plants |
| Foldable Single-Tier | Folds for storage | Vegetables, flowers | 12-16 plants |
| Tiered 3-Level Table | Compact footprint | Tomatoes, peppers, herbs | 24-30 plants |
| Rolling Pallet Cart | Mobile and versatile | Seasonal crops | 16-20 plants |
For herb gardens, I love the vertical pallet planter design—it’s perfect for basil, parsley, and thyme, which need minimal depth. Mount it near a south-facing window or balcony railing to ensure 6+ hours of sunlight.
If you’re growing tomatoes or peppers, opt for the tiered table—the extra height keeps fruits off the ground while maximizing sunlight exposure for lower tiers.
Don’t overlook foldable designs if you rent or need seasonal flexibility. A single-tier table with wheels lets you move it to catch sunlight or tuck it away during harsh weather.
For flower gardens, consider adding succulents or petunias to the top tier—they thrive in shallower soil and add color without competing for nutrients with veggies.
Pro tip: Use HDPE pallets for moisture resistance if your space gets frequent rain. For wood pallets, seal them with non-toxic outdoor paint to extend their lifespan. Always include drainage holes—even in vertical designs—to prevent root rot.
With the right layout, you’ll turn sparse square footage into a productive garden oasis without sacrificing style or functionality.
🌱