
How To
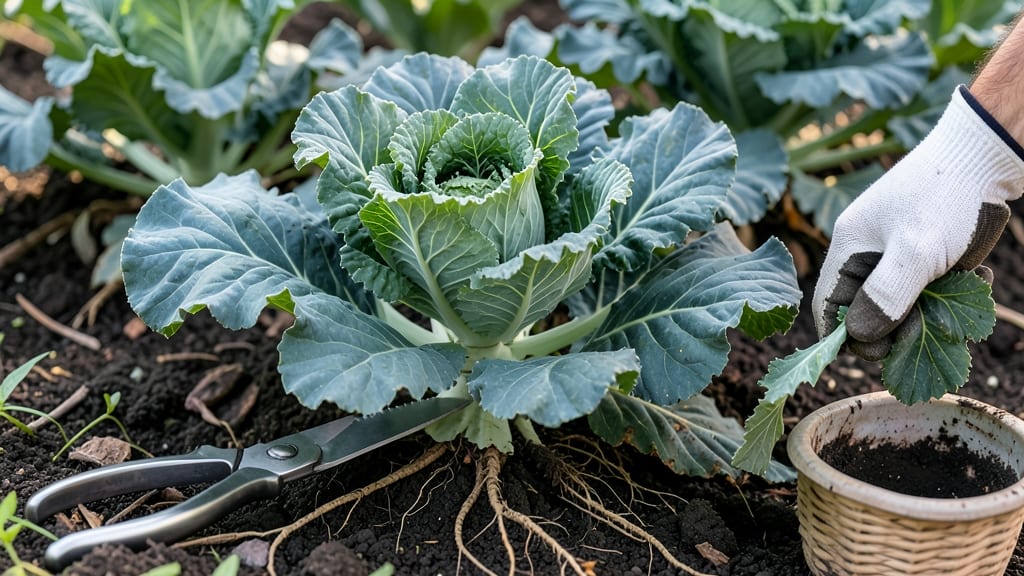
To pick kale from your garden at its peak flavor and texture, you’ll want to focus on leaf maturity and the right cutting technique—because harvesting too early or too late can turn your homegrown 🥬 into a tough, bitter mess.
Harvesting kale at the wrong stage is like waiting too long for coffee to brew: you end up with something that’s just not right. The key is timing—picking leaves when they’re fully developed but still crisp, so you get that perfect balance of tenderness and nutrition.
Most gardeners don’t realize that kale keeps producing new leaves after a harvest, as long as you leave the center intact. That means you can enjoy a steady supply all season if you know how to cut without damaging the plant.
In this guide, I’ll walk you through the 4 key leaf stages to watch for, the best tools to use, and simple tricks to keep your kale thriving—so you can enjoy fresh, homegrown greens for weeks to come.
4 Leaf stages for picking kale at peak flavor and texture
Knowing exactly when to harvest your kale can transform your garden harvest from bitter to sweet. Kale leaves mature through four distinct stages, each offering unique flavor and texture profiles.
The key is recognizing these stages so you can pick at the perfect moment—whether you're after tender baby greens or robust, mature leaves. I’ve grown kale for years, and these visual cues have saved me from countless disappointing harvests.
Start by examining the leaf size. Young shoots are delicate and tender, while mature leaves develop thicker stems and deeper color. The color intensity also shifts dramatically—from pale green to vibrant hues of dark green, purple, or red, depending on the variety.
Pay attention to these changes, as they directly impact both flavor and texture. For example, baby leaves are milder and more tender, while fully mature leaves offer a peppery kick and crisp bite.
Here’s how to identify each stage with confidence:
| Stage | Leaf Size | Flavor Profile | Texture | Harvest Tip |
|---|---|---|---|---|
| Stage 1: Baby Leaves | 2-4 inches | Mild, sweet | Tender, delicate | Pick entire small leaves or trim outer leaves. |
| Stage 2: Young Mature | 4-6 inches | Balanced, slightly earthy | Crisp, firm | Cut outer leaves, leaving inner growth intact. |
| Stage 3: Fully Mature | 6-12 inches | Bold, peppery | Thick, sturdy | Harvest lower leaves first to encourage regrowth. |
| Stage 4: Overmature | 12+ inches | Bitter, tough | Woody, fibrous | Avoid harvesting; remove to prevent bitterness. |
For curly kale varieties like Winterbor or Vates, the leaves form tight, frilly curls that tighten as they mature. In contrast, flat-leaf varieties such as Lacinato (Dinosaur kale) develop broader, smoother leaves with a slightly chewier texture.
Both types follow the same four stages, but their visual cues differ slightly. For example, curly kale’s frills become more pronounced at Stage 3, while flat-leaf kale’s leaves flatten and widen.
Timing your harvest also depends on your climate zone. In cooler regions like USDA Zone 6a, kale thrives in fall, reaching its peak flavor just before the first frost. In warmer zones, harvest in early spring or late fall to avoid the heat-induced bitterness.
I’ve found that morning harvests yield the crispiest leaves, as evening dew can make them soggy. Always use a clean, sharp pair of pruners or scissors to avoid damaging the plant.
When harvesting for regrowth, focus on the outer leaves first. This practice encourages the plant to produce new growth from the center, extending your harvest season by weeks.
For example, if you pick Stage 2 leaves regularly, your kale plant can continue producing Stage 1 and Stage 2 leaves for months. Just avoid cutting into the main stem, as this can stunt future growth.
One common mistake is waiting too long to harvest. By Stage 4, kale leaves become tough and bitter, with stems that are nearly woody. I once let my kale go past this stage, and the flavor was so harsh I had to discard it.
To avoid this, check your plants every 3-5 days during peak growing seasons. If you notice leaves curling inward or developing yellow edges, it’s a sign they’re past their prime.
Experiment with different stages to discover your favorite flavor. Baby leaves are perfect for salads, while mature leaves shine in stir-fries or roasted dishes. My personal preference is Stage 2 leaves—they strike the perfect balance between tenderness and bold flavor.
Try harvesting a few leaves from each stage and compare the results. You might be surprised by how much the texture and taste change!
Finally, remember that kale is a cut-and-come-again crop, meaning it keeps producing as long as you care for it. With the right harvesting techniques, you can enjoy fresh kale from your garden for months.
Start with these four stages, and soon you’ll be a pro at picking kale at its absolute peak.
When and how to harvest kale without damaging the plant
Timing your kale harvest is just as important as the method you use. Picking at the wrong time—like midday when leaves are wilted—can ruin flavor and texture, while harvesting too late makes the stems woody and bitter.
The best time to harvest is early morning after dew dries, when leaves are crisp and packed with nutrients. This timing also gives your plant time to recover before afternoon heat stress.
For continuous harvests, focus on selective leaf removal rather than cutting the whole plant. Start by harvesting outer leaves first, leaving the inner leaves to keep growing. This method encourages regrowth and extends your harvest season by 30-50% compared to full cutting.
Just avoid removing more than 1/3 of the plant at once, or you risk stunting future growth.
⚠️ Critical Mistakes to Avoid When Harvesting Kale
- Cutting too close to the stem: Leave 1-2 inches of stem attached to encourage regrowth.
- Harvesting in wet conditions: Damp leaves invite fungal diseases like downy mildew.
- Using dull tools: Ragged cuts invite pests and disease—always use sharp pruners or scissors.
- Ignoring leaf maturity: Over-mature leaves (yellowing or woody) won’t regrow well.
Pro Tip: Harvest every 2-3 weeks for a steady supply of fresh, tender leaves.
When cutting, use clean, sharp pruners or scissors to make clean cuts just above a leaf node (the point where leaves attach). This encourages new growth from that node. For baby leaves, simply pinch them off by hand—no tools needed!
Always work from the outer edges inward to protect the plant’s center, which holds the most growth potential.
Seasonal timing matters too. In spring and fall, when temperatures are mild, you can harvest weekly for 2-3 months per planting. But in hot summers, kale bolts (sends up a flower stalk) faster—so harvest aggressively to prevent bolting.
In cold climates, harvest before hard frosts (below 20°F) to enjoy tender leaves.
To prolong harvests, mulch around the base with straw or shredded leaves to retain moisture and protect roots. Also, side-dress with compost every 4-6 weeks to replenish nutrients. With these care tips, a single kale plant can provide harvests for 60-90 days—far longer than most gardeners expect!
Remember: Patience is key. Kale tastes best when harvested at the right stage—neither too young nor over-mature. By following these tips, you’ll enjoy crisp, flavorful leaves all season long without sacrificing your plant’s health. Happy harvesting! 🌿