
How To
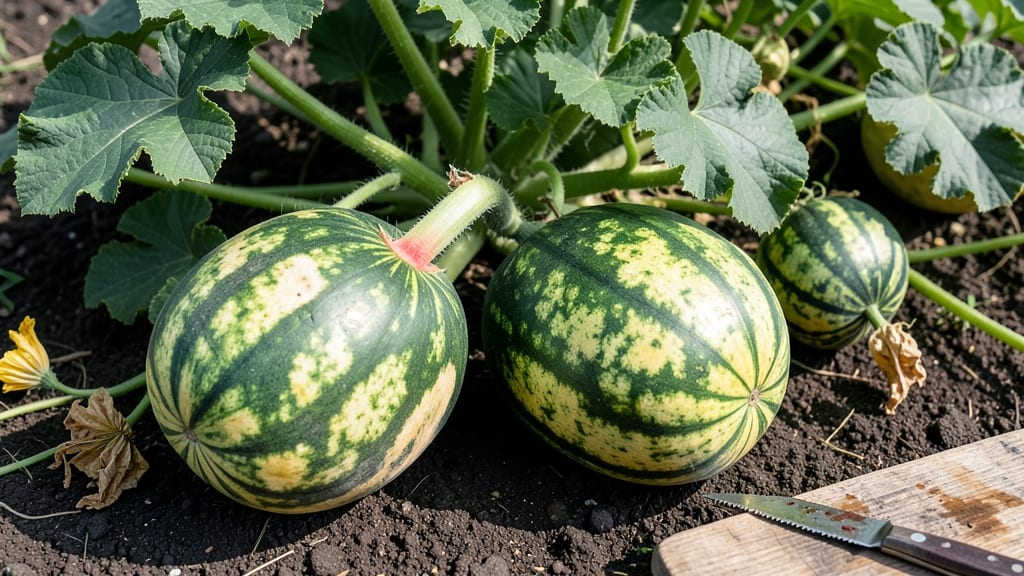
Knowing when to pick watermelon from your garden is all about reading the 🍉’s secret signals—because one wrong cut can turn your prize into a mushy disappointment.
Picking too early means bland, watery fruit, while waiting too long risks mealy, overripe melons. The trick? Master these 5 foolproof visual cues—from rind color shifts to the telltale "field spot"—so you never miss peak sweetness again.
We’ll cover the science behind each clue, like why a dull rind means sugar is peaking, and how to test ripeness beyond just looks. No more guesswork, just perfect melons every time.
Ready to harvest like a pro? Here’s how to spot the perfectly ripe watermelon before it slips away.
5 Visual cues to identify perfectly ripe watermelon in your garden
Watermelons are one of summer’s most rewarding garden crops—but timing your harvest is everything. A watermelon picked too soon tastes like water, while one left too long becomes overripe and mushy.
The good news? Nature gives you clear visual signals. These 5 foolproof cues will help you harvest at peak sweetness every time, no guesswork required.
Each clue ties directly to the biological ripening process. For example, the cream-colored field spot appears when the fruit stops growing and sugars concentrate. Meanwhile, chlorophyll breakdown causes that classic color shift from green to deep hue. Understanding these science-backed signs ensures you never miss the window again.
🌱 How to Know When to Pick Watermelon from Garden
- 1. Field Spot: Look for a cream or yellowish spot where the melon rests on the ground. This indicates the fruit has stopped growing and sugars are accumulating.
- 2. Rind Color: The deep, consistent color (varies by variety) replaces green. A dull, not shiny rind is a key sign of ripeness.
- 3. Tendril Changes: The small tendrils near the stem turn brown and dry. Live green tendrils mean the melon needs more time.
- 4. Stem Condition: The stem near the fruit should feel dry and papery. If it’s still green and moist, the melon isn’t ready.
- 5. Sound Test: Tap the melon near the stem. A deep, hollow sound suggests ripeness (though this isn’t foolproof—combine with other cues!).
Start with the field spot, as it’s the most reliable early indicator. I always check this first because it’s a clear signal that the watermelon’s growth phase is complete.
If you’re growing heirloom varieties, pay extra attention to the rind color shift, as these often retain green streaks longer than hybrid types.
The tendril test is often overlooked but critical. Those tiny, curly vines near the stem are like nature’s countdown clock. When they turn crispy and brown, it’s a surefire sign the melon is nearing peak ripeness.
Pro tip: Use a magnifying glass if your tendrils are small or hard to see.
For seedless watermelons, the rind may stay lighter than traditional varieties, so don’t rely solely on color. Instead, focus on the field spot and tendril dryness. I’ve learned this the hard way—once, I picked a seedless melon based on color alone, only to find it underripe and seedy-tasting!
If you’re unsure, wait 1-2 days and recheck. Overripe watermelons develop soft spots or mold, while underripe ones stay hard and watery inside. The thump test can help, but it’s not perfect—some ripe melons sound dull, while others remain hollow-sounding even when ripe.
Remember: Heat waves can speed up ripening, so monitor your melons closely during summer’s peak. If your garden’s in Zone 9 or higher, watermelons may ripen faster due to extended heat. Adjust your checks accordingly—sometimes daily inspections are needed!
Once you’ve confirmed all 5 visual cues, use a sharp knife or pruners to cut the stem about 1 inch from the fruit. This prevents damage to the vine and encourages more melons to develop. Store your harvest in a cool, dry place (50–55°F) for up to 2 weeks.
With these cues mastered, you’ll never again wonder “Is my watermelon ready?”. The first time you bite into a homegrown, perfectly ripe watermelon, you’ll understand why gardeners swear by these visual tricks. Happy harvesting! 🍉
How to test watermelon ripeness beyond visual clues: touch and sound methods
When visual cues like rind color or field spots aren’t enough, tactile and auditory tests become your best friends. These touch-and-sound methods reveal hidden ripeness clues that even experienced gardeners overlook.
The key? Understanding what each test actually measures—sugar content, seed maturity, and cell structure—not just hollow echoes or firmness.
Many gardeners assume a hollow thump means ripeness, but that’s a common myth. A ripe watermelon’s internal structure isn’t hollow—it’s dense with juice and seeds. Instead, focus on pressure points and stem texture, which correlate directly with sweetness and texture.
For example, seedless varieties often feel firmer at peak ripeness than heirlooms because their cell walls develop differently.
Here’s how to apply these methods accurately, including variety-specific adjustments:
| Method | Heirloom Varieties | Seedless Varieties | Best Time to Test |
|---|---|---|---|
| Thump Test | Tap near stem end—dull thud (not hollow) | Firmer thud; seedless rinds vibrate slightly | Late afternoon (warmer fruit = clearer sound) |
| Stem Detachment | Twist gently—dry stem snaps cleanly | Stem may pull away without snapping | Morning (cooler temps preserve texture) |
| Pressure Point | Press thumb into blossom end—slight give | Firmer press needed; no denting | Midday (fruit at peak firmness) |
| Weight Check | Feels heavy for size (juice density) | Lighter but dense (less water content) | Any time (compare to similar-sized melons) |
The thump test works best when you tap near the stem end (not the blossom end) and listen for a dull thud. A hollow sound usually means the melon is overripe or underripe—both extremes lack the ideal balance of sugars and moisture.
For seedless varieties, this test is less reliable because their thinner rinds muffle the sound. Instead, rely more on the pressure-point method.
My go-to trick? Combine the stem detachment test with the weight check. A ripe watermelon’s stem should pull away easily with a slight twist, leaving a dry, papery stub. Pair this with a heavy-for-size feel, and you’ve got a winner.
Pro tip: If the stem resists or feels moist, wait 2–3 days before testing again—this often means the melon needs more time on the vine.
For heirloom varieties, I also watch for a slight softening at the blossom end (where the flower was). Press your thumb here—if it gives just a little, the melon is likely at peak ripeness.
Seedless types, however, stay firmer longer, so focus on the stem dryness and overall weight instead. Remember, every variety has its quirks, so test a few melons from your patch to learn what “ripe” feels like for your garden.
🌱