
Picking
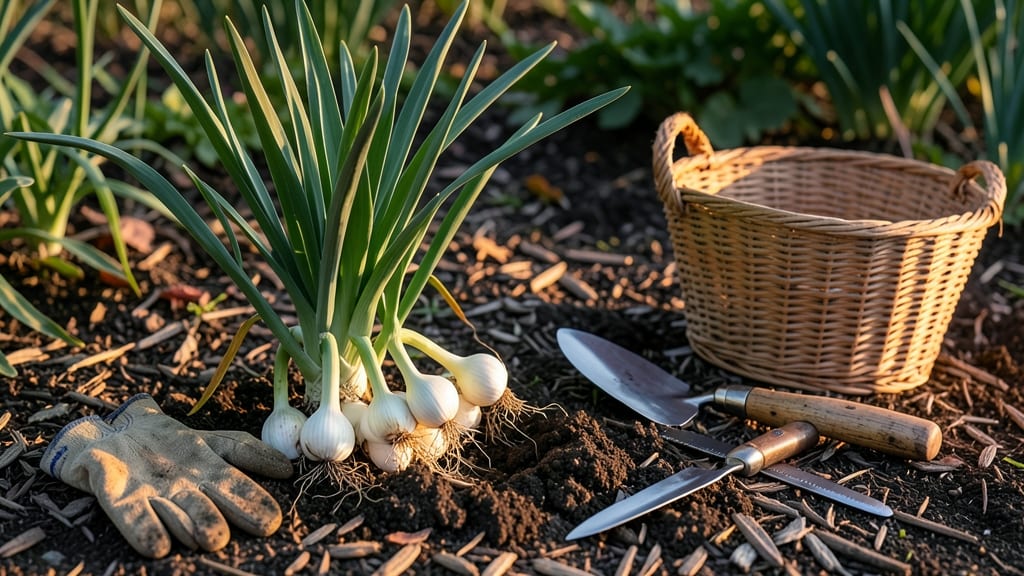
Harvesting shallots from your garden at the right time means the difference between bold, flavorful bulbs and tough, pungent rejects.
If you’ve ever dug up a shallot only to find it still small and green, you know how easy it is to miss the window. These 🧅 powerhouses need precise timing—too early, and you lose yield; too late, and the bulbs split or rot.
But with the right cues, you can pull them at peak size and flavor, every time.
Here’s how to spot the perfect moment, from the telltale yellowing of leaves to the ideal bulb size, plus the tools and techniques that make harvesting cleaner and more efficient.
Whether you’re a first-time grower or a seasoned gardener, these steps will help you maximize your harvest without a single wasted clove.
From curing to storage, I’ll walk you through every stage so your shallots stay fresh and ready to use—no more sad, shriveled leftovers in the pantry.
When to harvest shallots for peak flavor and bulb size
Timing your shallot harvest is everything—pull them too early, and you’ll get small, pungent bulbs. Wait too long, and they’ll split or rot. The key is watching for visual maturity cues while accounting for your local climate.
In most regions, this falls between late July and August, but cooler zones may need adjustments.
Start by observing your shallot foliage. When about 60% of the leaves turn yellow and begin to collapse, that’s your first sign. The bulbs should also feel firm and dry when gently squeezed.
If the skin is papery and the tops are wilting, you’re in the perfect harvest window.
Another clue: flower stalks (if present). If you see tall, hollow stems emerging, that’s nature’s signal to harvest soon—these stalks drain energy from bulb development. Remove them immediately to redirect nutrients back to your shallot bulbs.
Climate matters too. In hot, dry climates, shallots mature faster and may need harvesting by early August. In cooler zones (like USDA Zone 5), wait until late August or even early September. Always prioritize bulb firmness over calendar dates.
| Growing Zone | Ideal Harvest Time | Key Visual Cues | Bulb Size |
|---|---|---|---|
| Zones 3-5 (Cool) | Late August–Early September | 60% yellow leaves, papery skin | 1.5–2 inches |
| Zones 6-8 (Moderate) | Mid-to-Late August | Yellowing tops, firm bulbs | 1–1.5 inches |
| Zones 9-11 (Hot) | Early-to-Mid August | Dry foliage, no moisture | 1–2 inches |
For early harvests, you can pull shallots as early as 90 days after planting, but expect smaller bulbs (great for green onions or microgreens). Wait until 120 days for full-sized, flavorful shallots. If you miss the window, bulbs may split or rot—so don’t delay!
Morning is the best time to harvest—soil is cooler, and bulbs are firmer. Use a fork or spade to gently loosen the soil around the plant, then lift carefully. Avoid cutting the tops; leaving them attached helps the bulbs cure properly.
After harvesting, let shallots cure in the sun for 2–3 days. This hardens the skins and improves storage life. Store them in a cool, dry place with good airflow, like a mesh bag or ventilated container. With proper timing, your shallot harvest will last all winter!
Pro tip: Mark your calendar based on your planting date. If you planted in early spring, subtract 120 days to estimate your harvest window. Adjust for late plantings by adding extra days.
🌱
Step-by-step guide to digging shallots without damaging the bulbs
Harvesting shallots requires gentle care to preserve those delicate bulbs. Unlike onions, shallots form clusters, so rough handling can bruise or split them. The key is timing—wait until the foliage yellows and dries back naturally, but don’t let it fully collapse.
This balance ensures bulbs are mature yet still firm. I’ve perfected a method over years that minimizes waste and maximizes storage life, and I’m sharing it with you today.
Before you even touch your garden, gather the right tools. A garden fork or digging spade is essential for lifting bulbs without piercing them. Pair it with a basket or shallow tray to hold harvested shallots—never toss them into a pile, as this causes bruising.
Wear gloves to protect your hands from the sharp edges of mature bulbs. Once you’re ready, follow these steps to harvest your shallots with confidence.
How to Harvest Shallots Without Damage
- Step 1: Choose the Right Day Harvest on a dry, sunny morning after the dew has evaporated. Avoid harvesting after rain, as wet soil sticks to bulbs and increases rot risk.
- Step 2: Loosen the Soil Use a garden fork to gently loosen the soil around the shallot cluster. Insert the fork 3-4 inches away from the base and pry upward to avoid piercing bulbs.
- Step 3: Lift the Cluster Grasp the foliage stems and lift the entire cluster out of the ground. Shake off excess soil, but don’t rinse the bulbs—this removes protective dirt that aids curing.
- Step 4: Separate Gently Lay the cluster on a clean, dry surface and carefully separate individual bulbs by hand. Avoid cutting or twisting, as this damages the papery skins that protect stored shallots.
- Step 5: Trim and Cure Cut the foliage down to 1 inch above the bulb with a sharp knife. Let the shallots cure in a dry, shaded spot for 3-5 days to toughen the skins and prevent spoilage.
- Step 6: Store Properly Once fully cured, store shallots in a cool, dark place (50-60°F) with good airflow. Braid the stems together or place them in a mesh bag to maintain ventilation.
Post-harvest care is just as critical as the digging process itself. After curing, inspect each bulb for soft spots or cuts—these will spoil quickly. Discard any damaged shallots immediately to prevent rot from spreading.
For long-term storage, I recommend braiding the stems of 3-4 bulbs together. This traditional method keeps them organized and allows air to circulate, extending their shelf life to 6-8 months in ideal conditions.
One common mistake I see is harvesting too late. If you wait until the foliage is completely brown and crispy, the bulbs may split or rot during storage. Conversely, harvesting too early (when bulbs are still small and green) means you’ll sacrifice flavor and yield.
Aim for 70-80% foliage yellowing—this is your sweet spot for perfect shallots. With practice, you’ll develop an eye for the ideal moment.
Pro tip: If you’re harvesting in hot, humid climates, reduce the curing time to 2-3 days to avoid mold growth. Conversely, in dry, cool regions, you can extend curing to 5-7 days for extra protection.
Always adapt these steps to your local conditions for the best results. Happy harvesting!