
Shrubs
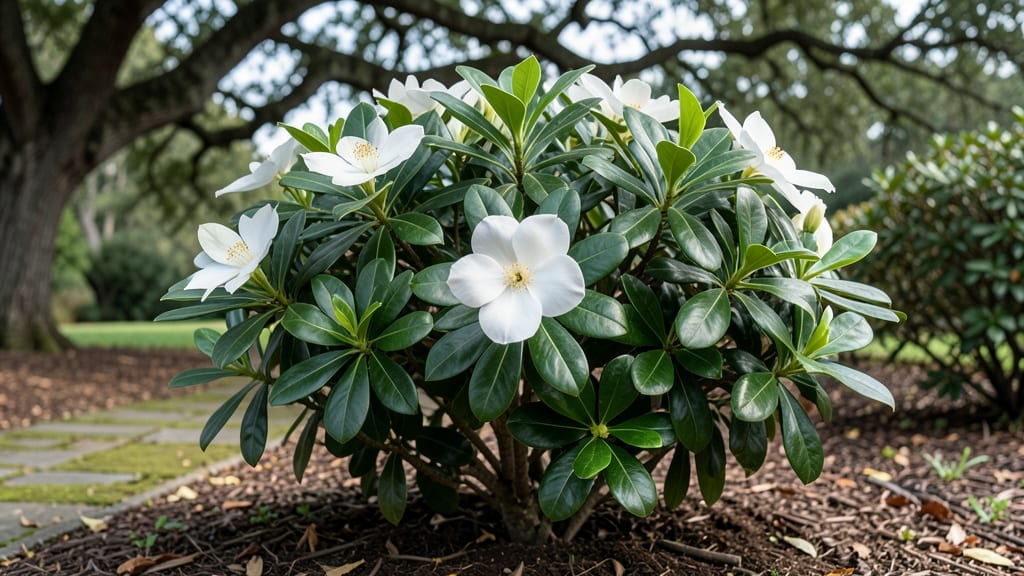
A full-grown gardenia 🌸 can reach heights of 3 to 6 feet and fill your garden with intoxicating fragrance—but only if you meet its precise needs.
Picture this: your gardenia stands tall, heavy with glossy, dark green leaves and clusters of creamy-white blooms, while your neighbors’ plants struggle with sparse flowers or yellowing foliage. The difference? Pruning at the right time and soil that mimics its tropical roots.
Most gardeners focus on watering and sunlight, but the real game-changer is the soil mix and pruning schedule. Acidic, well-draining soil and strategic trims keep your gardenia blooming year-round, while skipping these steps leads to weak growth and fewer flowers.
In this guide, I’ll walk you through the exact steps to prune for maximum blooms, the ideal soil mix for fragrant gardenias, and how to troubleshoot common issues before they ruin your plant’s beauty.
How to prune a full-grown gardenia for maximum blooms
Pruning your full-grown gardenia isn't just about shaping—it's the secret to unlocking those heavy, fragrant blooms you adore. When done right, pruning encourages new growth, improves air circulation, and keeps your shrub looking lush.
But timing and technique matter—cut too much or at the wrong time, and you might sacrifice next year's flowers. Let's dive into the precise steps to prune your gardenia for a bloom-filled future.
First, gather your tools: sharp pruning shears, sterilized garden gloves, and a clean cloth for wiping tools between cuts. Gardenias are sensitive to disease, so cleanliness is key. The best time to prune is right after flowering, typically in late spring or early summer.
This timing lets you remove spent blooms while giving new buds room to form. Avoid heavy pruning in fall or winter, as your gardenia needs all its energy to survive cooler months.
Now, let's get to the heart of the matter—your gardenia's branches. Focus on three key areas during pruning: dead or diseased wood, crossing branches, and overcrowded growth. Dead wood should be removed first—it’s unsightly and can harbor pests.
Next, trim any branches that rub against each other, as these abrasions create wounds that invite infections. Finally, thin out the center of the shrub to improve airflow and sunlight penetration, which are critical for healthy blooms.
Step-by-Step Pruning Guide
- 🌿 Step 1: Remove Dead or Diseased Branches
Cut back any branches that are brown, mushy, or showing signs of disease. Use clean, sharp shears to make a 45-degree angle just above a leaf node or bud. - 🌿 Step 2: Trim Crossing or Rubbing Branches
Identify branches that cross or rub against each other. Remove the weaker branch at its base to prevent wounds and infections. - 🌿 Step 3: Thin Out Overcrowded Growth
Focus on the center of the shrub. Cut back up to one-third of the oldest branches to encourage new, vigorous growth from the base. - 🌿 Step 4: Shape the Outer Canopy
Lightly trim the outer edges to maintain your gardenia's natural shape. Avoid cutting more than 25% of the plant's foliage in one session. - 🌿 Step 5: Clean Up and Sterilize
Remove all pruned debris from the area and sterilize your tools with rubbing alcohol to prevent spread of disease. - 🌿 Step 6: Fertilize After Pruning
Apply a balanced, acid-loving fertilizer (like 10-10-10) to support new growth and future blooms.
Pro tip: Always prune just above a leaf node or outward-facing bud. This ensures new growth will fill out the shrub rather than create a bare spot.
If you're unsure where to cut, imagine drawing a line from the branch to the outer edge of the plant—this is your guide for encouraging outward growth. Avoid cutting into old wood, as gardenias bloom on new wood, and pruning too aggressively can reduce next year's flowers.
After pruning, give your gardenia some extra care to help it recover. Water deeply to replenish moisture lost during the process, and mulch around the base with organic matter like pine bark or compost.
This helps retain moisture and keeps the roots cool. Avoid heavy watering for the first 24 hours after pruning, as fresh cuts are more susceptible to fungal infections when overly wet.
One common mistake is pruning too late in the season, which can stimulate new growth that won’t harden off before winter. If you missed your late spring window, you can do a light shaping trim in early fall, but avoid heavy pruning.
Gardenias are sensitive to cold, and new growth won’t survive frost. If you live in a cooler climate, wait until spring to prune to avoid winter damage.
Finally, keep an eye on your gardenia in the weeks after pruning. Healthy new growth should appear within 4-6 weeks, and you’ll start seeing buds forming by late summer for next year’s blooms.
If you notice yellowing leaves or dropping buds, it might be a sign of stress or nutrient deficiency. In this case, adjust your watering or fertilization routine and monitor closely.
With the right pruning technique, your gardenia will reward you with lush foliage and intoxicating fragrance for years to come.
Remember, the key to pruning a full-grown gardenia is patience and precision. Take your time, follow these steps, and your gardenia will thrive, becoming the fragrant star of your garden. Happy pruning!
The ideal soil mix and fertilization for fragrant gardenias
Your full-grown gardenia thrives when planted in the right soil mix—one that mimics its natural, acidic tropical habitat. The key to abundant blooms and intense fragrance lies in a soil blend that balances drainage and nutrient retention.
Without this, your gardenia may struggle with yellowing leaves or sparse flowering, even with perfect sunlight. Let’s break down the essentials for creating the perfect growing medium.
Gardenias demand acidic soil with a pH between 5.0 and 6.0. If your soil tests higher, your plant will suffer from nutrient deficiencies, particularly iron and manganese.
I’ve found that amending the soil with organic matter like peat moss or pine bark fines is the easiest way to lower pH naturally. For drainage, avoid compacted clay—your gardenia’s roots need air and water to flow freely, or they’ll rot.
DIY Soil Mix vs. Store-Bought—which works better? While pre-mixed acid-loving plant soil is convenient, a custom blend often outperforms it. My go-to mix includes 50% peat moss or coco coir, 30% perlite or coarse sand, and 20% compost or aged pine needles. This combination ensures moisture retention while preventing waterlogging. For store-bought options, look for bags labeled "azalea/camellia mix"—these are formulated for the same pH range.
| Factor | DIY Soil Mix | Store-Bought Mix |
|---|---|---|
| pH Level | 5.0-6.0 (adjustable) | 5.0-6.0 (fixed) |
| Drainage | Excellent (perlite/sand) | Good (varies by brand) |
| Organic Matter | Customizable (compost/needles) | Limited (pre-mixed) |
| Cost | Moderate ($15-25/yard) | Higher ($5-10/bag) |
| Best For | Long-term performance | Quick setup |
Fertilizing your full-grown gardenia requires a balanced approach. During the growing season (spring and fall), use a 10-10-10 or 8-3-9 fertilizer every 4-6 weeks to promote blooms and foliage. In summer, reduce feeding—your gardenia enters a semi-dormant state and can suffer from fertilizer burn.
I swear by organic options like fish emulsion or cottonseed meal, which slowly release nutrients without spiking pH levels.
One mistake I see often is over-fertilizing in winter. Gardenias don’t need nutrients when they’re dormant, and excess salts in the soil can actually stunt growth. Instead, focus on mulching with pine straw or shredded leaves to insulate roots and maintain soil acidity.
This simple step can double your blooms next season by reducing stress on the plant.
For container-grown gardenias, repot every 2-3 years with fresh acidic mix. Add a handful of sulfur granules to the soil to keep pH in check, and always water with rainwater or distilled water—tap water’s minerals can raise pH over time.
With the right soil and feeding schedule, your gardenia will reward you with glossy leaves and heavy fragrance all year round. 🌸