
Tools
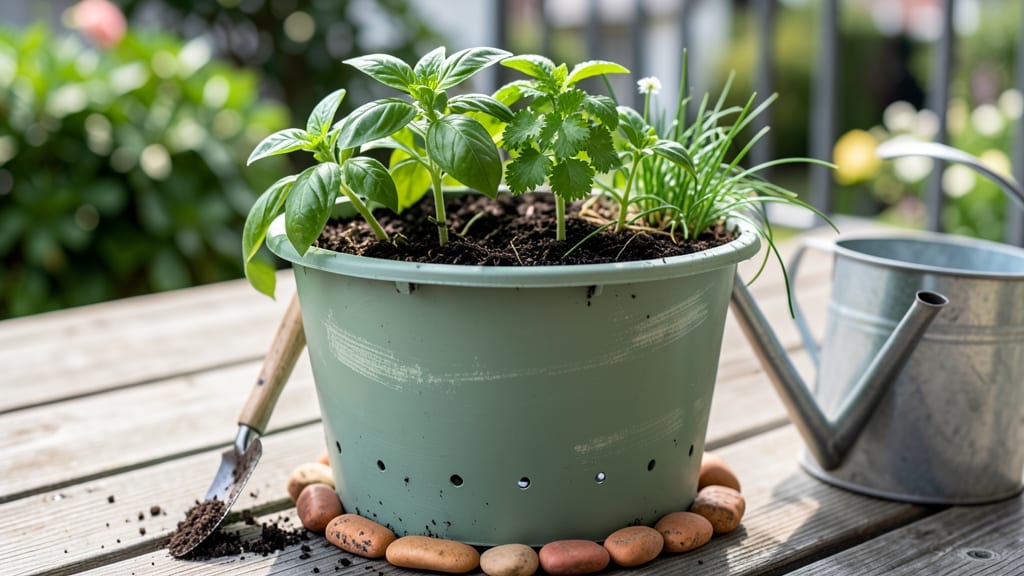
Bucket gardening 101 turns even the smallest balcony or windowsill into a productive garden 🌱—no sprawling yard needed.
Struggling to grow a garden in a tiny apartment or urban space? Bucket gardening transforms limited square footage into a thriving, high-yield plant oasis—no backyard required. Whether you dream of fresh herbs, crisp lettuce, or vibrant flowers, this method gives you control over space, soil, and sunlight.
The key to success starts with the right containers, soil mix, and drainage—details that make all the difference between wilting plants and a lush harvest. I’ll walk you through the basics, from choosing the perfect buckets to keeping your greens happy all season long.
By the end, you’ll know exactly how to set up a space-saving, low-maintenance garden that fits your lifestyle—and maybe even impress your neighbors with homegrown tomatoes by summer! 🍅
Bucket gardening basics: containers, drainage, and soil secrets
Bucket gardening is one of the simplest ways to grow fresh produce in small spaces. Whether you're using 5-gallon buckets or fabric grow bags, the key to success lies in proper setup.
I’ve learned that the right container, drainage, and soil mix can transform a basic bucket into a thriving mini-garden. Let’s break down the essentials to get you started on the right foot.
First, choose containers with at least 5 gallons of capacity for most vegetables and herbs. Smaller containers work for leafy greens, but larger roots like tomatoes need more space.
I recommend food-grade buckets with drainage holes to prevent root rot. If your buckets don’t have holes, drill them yourself—it’s a quick fix that makes all the difference.
Drainage is non-negotiable in bucket gardening. Without proper drainage, roots suffocate, and your plants will wilt despite your best efforts. I always add a layer of gravel or broken pottery at the bottom of each bucket before filling it with soil.
This creates airflow and prevents water from pooling. For extra insurance, consider using grow bags with built-in drainage—they’re designed to handle moisture efficiently.
Now, let’s talk soil. Store-bought potting mix works, but I swear by a custom blend for better results. Mix 60% potting soil, 30% compost, and 10% perlite or vermiculite for optimal drainage and nutrient retention.
This combo keeps roots happy while preventing compaction. Avoid garden soil—it’s too heavy and can clog drainage holes.
Don’t overlook the importance of container material. Plastic buckets retain moisture longer, while fabric grow bags allow roots to breathe better. I’ve had great success with fabric grow bags for herbs—they dry out faster, reducing the risk of root rot.
For heavy feeders like tomatoes, stick with plastic or metal buckets to retain nutrients longer.
When setting up your buckets, place them in a location with at least 6 hours of sunlight daily. South-facing windows or balconies are ideal. If you’re growing in shade, opt for low-light plants like basil or spinach.
I’ve also found that elevating buckets on plant stands or pallets improves airflow and makes harvesting easier—especially for tomatoes and peppers.
One mistake I see beginners make is skipping the soil sterilization step. To prevent pests and diseases, mix in a handful of compost or worm castings and avoid reusing old soil.
If you’re repurposing buckets, clean them thoroughly with a 10% bleach solution before planting. This simple step can save your garden from fungal infections.
Finally, remember that bucket gardening is all about adaptability. You can move your containers to follow the sun or protect them from harsh weather. I once moved my tomato buckets indoors during a heatwave, and they recovered beautifully.
The key is observing your plants and adjusting their environment as needed.
With the right containers, drainage, and soil, your bucket garden will thrive—even in the smallest of spaces. Start with these basics, and you’ll be harvesting fresh herbs and veggies in no time. Happy planting! 🌱
Top 5 space-saving bucket gardening layouts for high-yield crops
If you're working with limited space but want a bountiful harvest, bucket gardening layouts are your secret weapon. These vertical and stacked arrangements maximize sunlight exposure while keeping your plants healthy and productive.
Whether you're growing herbs on your balcony or tomatoes in your kitchen, these proven setups help you grow more in less space—without sacrificing yield or ease of care.
One of the biggest challenges in small-space gardening is sunlight competition. By strategically stacking and arranging buckets, you can ensure every plant gets the 6+ hours of sunlight it needs daily.
For example, placing leafy greens in the top tier (where they get dappled light) while reserving the bottom tier for sun-loving tomatoes creates a perfect balance. This layered approach also makes harvesting easier—no more bending or stretching!
Below, I’ve outlined five high-yield bucket layouts that work for urban balconies, apartment patios, or even indoor windowsills. Each layout includes plant compatibility tips to avoid shading issues and ensure optimal growth.
The key is pairing plants with similar sunlight and water needs while varying their heights to maximize space efficiency.
For herb lovers, the Vertical Herb Tower is a game-changer. Stack three 5-gallon buckets vertically, placing the tallest herbs (like basil) at the bottom and shorter varieties (like chives) at the top.
This setup ensures all herbs get even sunlight exposure while saving precious floor space. Plus, herbs like basil and parsley thrive in the same moisture and sunlight conditions, making them perfect companions.
If you're dreaming of homegrown tomatoes, the Stacked Tomato & Green Duo is a must-try. Place a determinate tomato variety (like 'Tiny Tim') in the bottom bucket and leafy greens (lettuce or spinach) in the top bucket.
The tomatoes will get the full sun they crave, while the greens benefit from the dappled light filtering through. This combo also makes harvesting a breeze—just reach down for tomatoes and up for greens!
Don’t overlook peppers and strawberries—they’re a dynamic duo in bucket gardening. Use a two-tier setup with dwarf pepper plants in the bottom bucket and strawberries cascading over the sides in the top bucket.
Both love full sun and well-draining soil, and the strawberries will trail beautifully while producing sweet fruit. Just be sure to prune the strawberries regularly to keep them contained and prevent shading the peppers below.
For leafy greens enthusiasts, the Three-Tier Leafy Green Stack is a cut-and-come-again dream. Fill each bucket with kale, Swiss chard, and arugula, rotating them weekly to ensure even sunlight. This layout maximizes vertical space while keeping all greens within arm’s reach.
Since leafy greens tolerate partial shade, you can even place this stack near a south-facing window if outdoor space is limited.
Finally, the Balcony Veggie Pyramid is perfect for root crops and podding plants. Start with carrots or radishes in the bottom bucket (they need deeper soil), then add bush beans in the middle, and top with green onions.
This setup mimics a natural vertical garden while ensuring each plant gets the right amount of sunlight and nutrients. Just remember to water from the top to avoid disturbing the roots of the lower plants.